
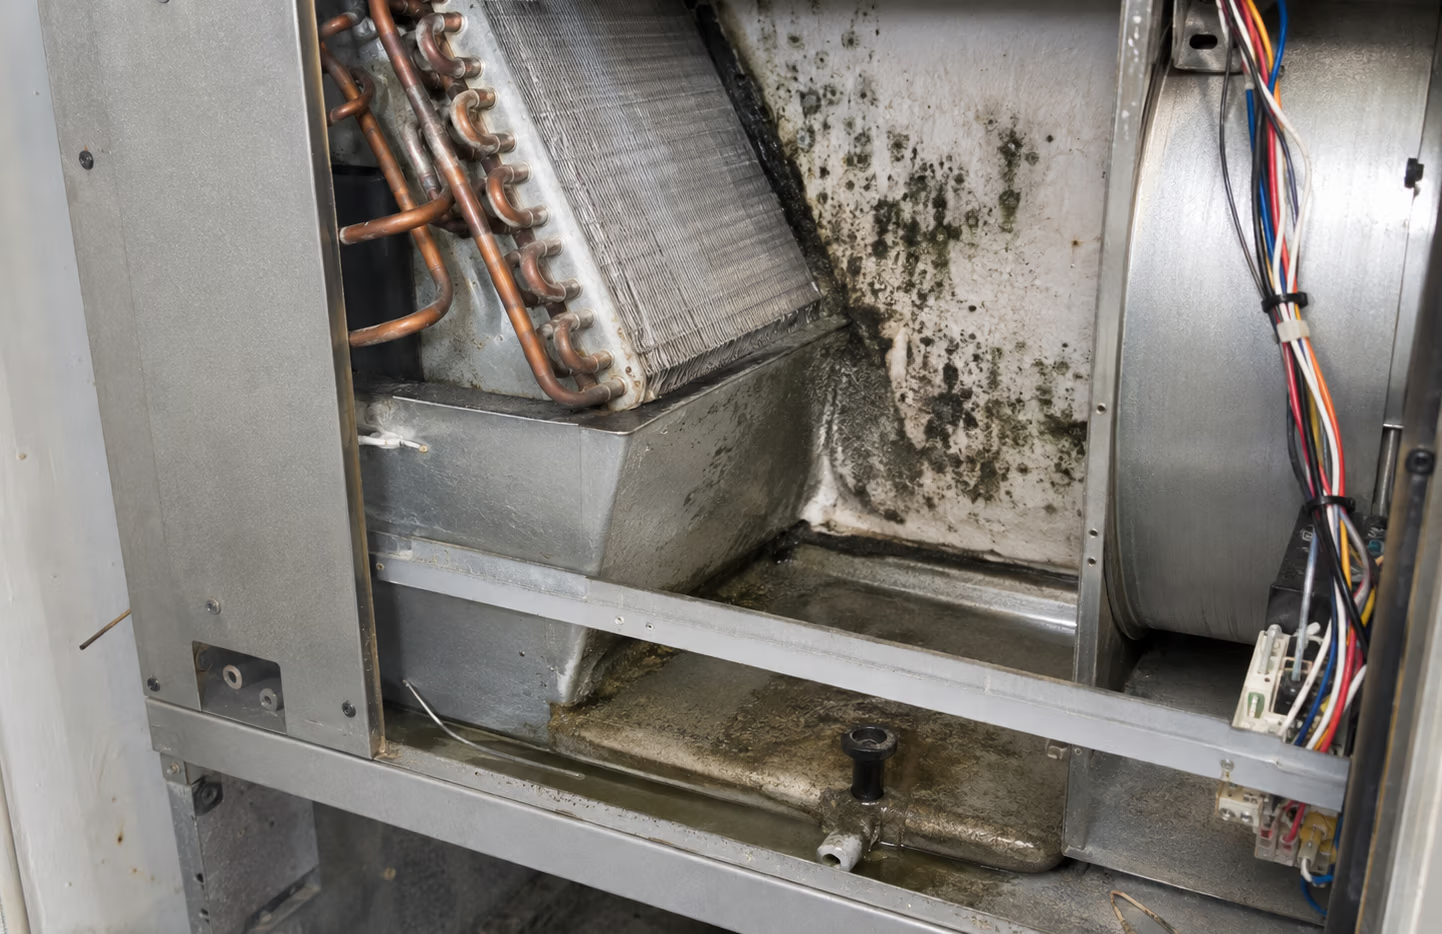
Black Mold in the Air Handler
How to Tell, and What Remediation Actually Involves
Dark growth inside an air handler can signal a moisture problem, but color alone cannot identify the mold species or prove that the growth is “toxic black mold.” A qualified inspection looks for both microbial growth and the moisture source that allowed it to develop.
Your air handler moves conditioned air throughout your home. However, when moisture, dust, and organic debris collect inside the cabinet, mold can grow on insulation, drain pans, blower assemblies, wiring surfaces, and nearby duct components. As a result, each cooling cycle can disturb particles and carry musty odors through the system.
Homeowners often call any dark-colored growth “black mold.” Although that description makes sense visually, it does not provide a laboratory identification. In fact, many types of mold appear black, dark green, brown, or gray. Therefore, a technician cannot confirm the species by sight, smell, or a photograph alone. When species identification matters, a licensed mold assessor or qualified environmental professional must collect samples and send them to a laboratory.
Why Mold Grows Inside an Air Handler
Mold needs moisture and a food source, and an air handler can provide both. For example, condensation forms naturally as warm, humid air passes over the cold evaporator coil. Under normal conditions, the drain pan and condensate line collect and remove that water. Problems begin, however, when water remains inside the cabinet or surrounding materials stay damp.
Common causes include:
- A clogged, slow, cracked, or improperly pitched condensate drain
- A rusted, damaged, or overflowing drain pan
- Dirty evaporator coils that restrict airflow and hold moisture
- An oversized system that cools the home too quickly to remove enough humidity
- Low airflow caused by dirty filters, blower problems, blocked returns, or duct restrictions
- Air leakage around the cabinet, plenum, filter rack, or return box
- Wet or deteriorated internal insulation
- High indoor humidity, especially during South Florida’s long cooling season
- A nearby roof, plumbing, or building-envelope leak
Signs That the Air Handler May Have Mold Growth
No single symptom confirms mold, but several warning signs justify a closer inspection:
- A persistent musty or earthy odor that becomes stronger when the system runs
- Black, green, gray, or brown spotting inside the cabinet or around the supply plenum
- Growth or staining on internal insulation, the blower compartment, drain pan, or coil housing
- Recurring dark buildup around supply registers after routine cleaning
- Standing water, heavy condensation, rust, or water staining near the unit
- Peeling duct tape, failed mastic, or visible air leakage around cabinet connections
- Indoor humidity that regularly remains above a comfortable range
- A condensate line that repeatedly clogs or backs up
Even so, these signs do not confirm mold on their own. Dust can look like mold, while mold can hide beneath insulation or behind panels. For that reason, a proper assessment should separate ordinary debris from suspected microbial growth and document the system’s moisture and mechanical conditions.
What a Proper Inspection Includes
Because surface clues tell only part of the story, a meaningful inspection goes beyond opening the front panel and taking one photograph. Instead, the inspector should examine the air handler, evaporator coil, blower wheel and motor, drain pan, condensate line, filter rack, internal insulation, supply plenum, return box, accessible ductwork, and nearby building materials.
Next, the evaluation should identify why moisture accumulated. That may require temperature and humidity readings, airflow observations, temperature differential checks, cabinet leakage checks, drain testing, and a review of coil and blower cleanliness. Moreover, when HVAC performance appears abnormal, a licensed HVAC contractor should evaluate refrigerant conditions, electrical components, static pressure, and system operation.
In addition, involve a Florida-licensed mold assessor if the suspected growth covers a significant area, affects building materials, returns after cleaning, or concerns occupants with health issues. The assessor can then develop a remediation protocol and perform post-remediation verification when the project requires independent clearance.
What Air-Handler Remediation Actually Involves
Once the inspection defines the problem, professional remediation should control contaminants, physically remove buildup, treat salvageable surfaces, and correct the moisture source. However, the exact scope depends on the affected components and the condition of the system.
1. Shut down and protect the system
First, the crew turns off the equipment and protects nearby flooring, walls, furnishings, and occupied areas. Depending on the conditions, the work plan may also include a localized containment area when opening the unit could release significant debris.
2. Control airborne particles
Next, technicians use HEPA-filtered equipment and careful work practices to keep loosened dust and microbial particles from spreading. For larger or more complex projects, the crew may also establish negative pressure containment.
3. Remove unsalvageable porous material
After controlling the work area, the crew removes materials that cannot support reliable cleaning. Wet, deteriorated, or heavily contaminated internal insulation, for example, may require removal and replacement. Because cleaning cannot restore every porous material, a contractor should never coat over saturated or failing insulation and call the problem solved.
4. Clean components through physical contact
The crew HEPA-vacuums loose debris and cleans accessible surfaces. Depending on the unit, this work may include the blower wheel, blower housing, cabinet, drain pan, coil housing, filter rails, and accessible plenum or return surfaces. The process should follow equipment-manufacturer requirements and protect electrical components.
5. Clean the evaporator coil correctly
At the same time, the crew must address the evaporator coil. A dirty coil can restrict airflow, trap moisture, and support recurring contamination. Technicians select a coil-safe cleaner, rinse or remove residue as required, protect electronics, and verify that water drains properly. In severe cases, the project may require coil removal or replacement.
6. Apply antimicrobial products only where appropriate
A registered product may support the cleaning process on approved surfaces, but chemicals do not replace source removal. Fogging alone does not remove dust, residue, or damaged material. The contractor should follow the product label, observe dwell times, and confirm material compatibility.
7. Seal leaks and restore drainage
Once the cleaning is complete, the team repairs accessible cabinet or plenum leakage with HVAC-rated materials, clears and tests the condensate line, corrects drain-pan issues, and addresses other moisture sources within the approved scope.
8. Reassemble, test, and document
Finally, the contractor reassembles the equipment, installs a clean filter, starts the system, checks basic operation and drainage, and documents the work with before-and-after photographs. When the project protocol calls for it, independent post-remediation verification follows.
Why Fogging or Spraying Alone Falls Short
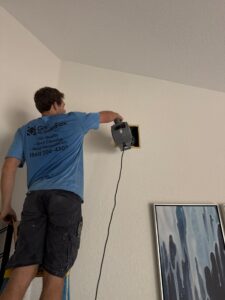
By contrast, a contractor may promise to spray, fog, or “sanitize” the air handler in a few minutes. Although that approach may change the odor temporarily, it leaves the contamination source in place. Mold, dust, biofilm, and damaged insulation require physical removal or detailed cleaning. Furthermore, a coating can trap moisture or conceal a problem when someone applies it over dirty or wet material.
Therefore, effective remediation follows a simple order: stop the moisture, remove unsalvageable material, clean salvageable components, dry the system, and verify operation. Antimicrobial products can supplement that process; however, they cannot replace it.
When Cleaning Is Not Enough
In some cases, replacement makes more sense. That often happens when components show extensive corrosion, insulation has deteriorated, contamination has reached inaccessible internal areas, the coil cannot be cleaned effectively, or the equipment has reached the end of its service life. Before proceeding, a qualified HVAC contractor should compare the cost and likely durability of remediation against replacement.
Likewise, the same principle applies to connected ductwork. Flexible duct with contaminated or wet interior insulation often cannot support aggressive cleaning, while metal duct and fiberglass-lined components require different methods. Therefore, the contractor should evaluate each material instead of promising one treatment for the entire system.
How to Reduce the Chance of Regrowth
- Keep indoor humidity under control and investigate persistent readings above roughly 60%.
- Replace filters on schedule with the correct size and efficiency for the system.
- Keep return grilles, supply registers, and furniture arrangements from restricting airflow.
- Service the condensate drain and inspect the drain pan before peak cooling season.
- Repair air leaks around the filter rack, return box, cabinet, and plenums.
- Schedule HVAC maintenance that includes coil, blower, drainage, and temperature-performance checks.
- Address roof, plumbing, attic, or building-envelope moisture before it reaches the HVAC system.
What Homeowners Should Expect From a Reputable Contractor
Ultimately, a reputable contractor should show you the affected areas, explain what can be cleaned and what requires replacement, identify likely moisture sources, describe how the crew will protect the home, and provide a written scope. In addition, the company should document the completed work and avoid promising that a quick spray will “kill everything” permanently.
Before approving the work, ask whether the project requires a separate mold assessment, whether the contractor holds the licenses required for the work, which products the crew plans to use, and how the team will confirm drainage and HVAC operation after cleaning.
The bottom line: Dark growth in an air handler deserves attention, but remediation should focus on more than color. The right process identifies the moisture source, removes contamination through physical cleaning or material replacement, protects the occupied space, and verifies that the HVAC system can operate without recreating the same damp conditions.
Need an air-handler or indoor air quality assessment?
Greenfox Air Quality provides detailed HVAC and indoor air quality evaluations throughout South Florida, with photo documentation and practical recommendations based on the condition of the system. Visit greenfoxair.com to request an assessment or call us at (561) 206-4307.
